
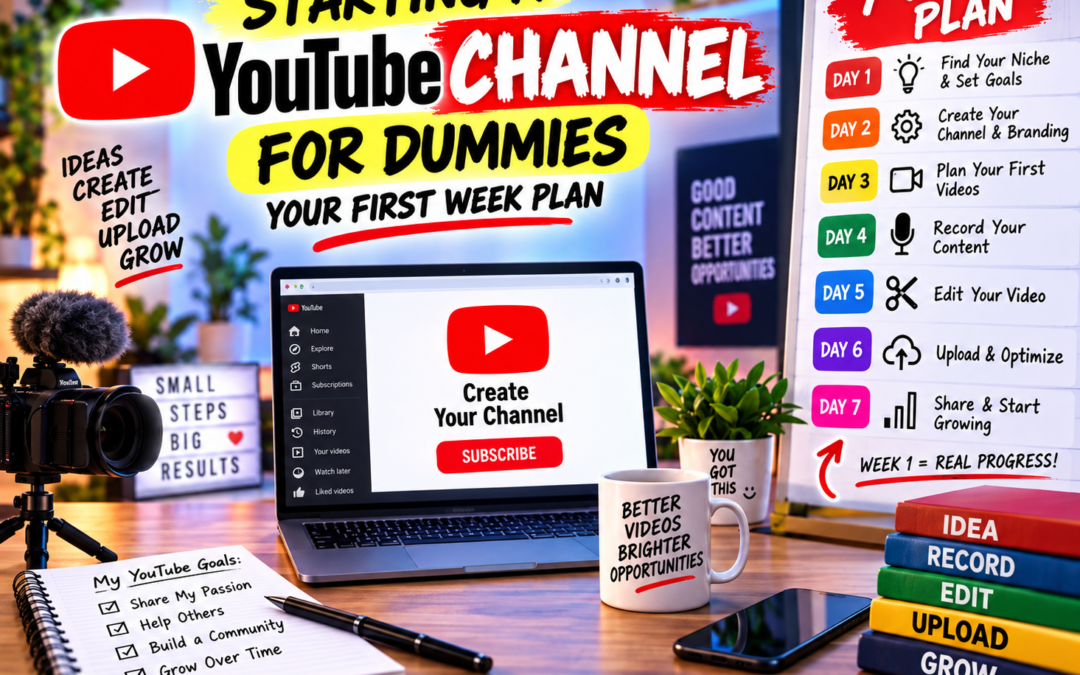
Starting a YouTube channel feels complicated because everything gets mixed together at once. Naming, filming, editing, thumbnails, niches, subscribers, monetization, and a dozen opinions about what you are doing wrong. Strip all of that away and the actual beginning is simple: decide what the channel is about, set it up, make one video, and publish it.
This plan spreads that work across seven days with one clear job per day. It is written for someone who has never uploaded a video, has no audience, and probably has no proper equipment. The goal is not a perfect channel. The goal is a live channel with one published video and a repeatable process you can run again next week.
What One Week Can and Cannot Do
A week will not build an audience. It will not teach you everything about the platform and it will not make your first video look like the ones from creators who have been uploading for three years. Setting that expectation early saves a lot of frustration.
What a week can do is get the foundation out of the way. You can choose a direction, focus on a specific viewer, name the channel, build a small idea list, record something, upload it, and learn where every part of the upload screen lives. Those are the mechanics. Everything after the first week is repetition and improvement, which is a much easier problem to solve than a blank channel with nothing on it.
Day 1: Decide What the Channel Is Actually About
Day one is entirely thinking and typing. No filming, no buying anything, no editing software. Open a document and answer two questions.
Pick a Niche You Can Feed for Months
The most common beginner mistake is choosing a topic that produces three good video ideas and then dries up. The practical test, as creators often put it, is to pick something you can make lots of content for and not get bored or burnt out on. Enthusiasm fades around video four or five, so the topic has to be big enough to keep supplying ideas.
A useful exercise is to write down ten possible video titles in your chosen area. If you can list ten without straining, the topic has room. If you stall at three, the topic is probably too narrow or too unfamiliar to sustain a channel.
Describe the Viewer in One Sentence
Step two in most beginner guides is focusing on your target audience. That sounds corporate, but it means something concrete: who is the person watching, and what do they already know? A video explaining the basics of a hobby is useless to an expert and confusing to a total newcomer. Write one sentence like "a person who just bought their first [thing] and has no idea where to start." Every later decision, from titles to thumbnails, gets easier when that sentence exists.
Day 2: Set Up the Channel
Day two is admin, and it should take about an hour. Sign in with a Google account you actually check, because that is the account tied to the channel and any notifications about it. Then make the visible decisions.
Choose a channel name that is easy to say out loud, easy to spell after hearing it once, and not so narrow that it locks you out of related topics later. Add a short channel description that states what a new viewer gets from subscribing. Upload a simple profile image and banner. Resist the urge to spend three days designing graphics. A clean, readable channel beats a beautiful, empty one.
One thing worth handling now rather than later: check the channel settings and description while you are in there, and confirm anything platform-specific with YouTube's own help pages, since menus and options do change over time.
Day 3: Sketch Ten Video Ideas
You already drafted ten rough titles on day one. On day three, turn them into a working list with a short note beside each one covering what the video would actually show or explain. This list becomes your safety net for weeks two through ten.
Order the list by which idea is easiest to make first, not by which is most impressive. Video one should be something you can produce in a single afternoon. Confidence comes from finishing, and the fastest way to finish is to pick a small, contained topic.
Day 4: Set Up a Filming Space You Already Have
No shopping trip required. Pick the quietest room in your home, put the camera, which is probably your phone, at roughly eye level, and face a window so daylight lands on you rather than behind you. Check that the background is not distracting and that nothing in frame identifies where you live if you would rather keep that private.
Record thirty seconds of test footage and watch it back. You are checking three things: can you hear yourself clearly, is the picture bright enough, and does the framing look intentional? Fix whatever fails, then stop adjusting. The setup will improve once you have made a few videos and know what actually bothers you.
Day 5: Record Your First Video
Write five bullet points covering what the video needs to say. Not a script, just the sequence. Then record. Talk to the one viewer you described on day one rather than to an imagined crowd, and expect to restart a few times in the first two minutes before the nerves settle.
Do not chase a perfect take. Aim for a recording where the information is correct and the audio is clear, and accept the small stumbles. If you record three full takes you will keep comparing them and never upload. One solid take is enough for video one.
Day 6: Edit, Upload, and Write the Title
Editing on day six means trimming the pause at the start, cutting the obvious mistakes, and making sure the video ends without trailing off. Keep it minimal. Fancy editing is not the reason a first video succeeds or fails.
Then upload. Give the video a title that states plainly what the viewer will learn, and write a description that expands on the title rather than repeating it. Choose a thumbnail that is readable at small size, which usually means fewer words and a clear subject. Publish as unlisted first if you want to watch it once more on a different screen before anyone else can see it.
Day 7: Publish and Point Shorts at the Video
On day seven, make the video public and share it in the places where your target viewer already spends time. Then record a short vertical clip from the same footage or a related quick tip, and use it to send people toward the full video. Short clips are a low-effort way to market long-form content, and they give you a second, faster format to practice with while the main video finds its footing.
That is the whole week. The channel exists, one video is live, and you have nine more ideas queued up.
First-Week Checklist
| Day | Main task | Output |
|---|---|---|
| 1 | Choose a niche and describe the viewer | Two written answers |
| 2 | Create and brand the channel | A live, named channel |
| 3 | Turn rough titles into a working list | Ten usable video ideas |
| 4 | Set up a simple filming spot | Test footage you approve of |
| 5 | Record video one | One complete take |
| 6 | Trim, upload, title, thumbnail | A prepared upload |
| 7 | Publish and promote with a short clip | First public video |
Beginner Mistakes to Avoid This Week
- Spending the week buying equipment instead of publishing. The first video is a learning exercise, not a showcase.
- Choosing a niche so narrow that the idea list runs dry after three videos.
- Rewriting the channel name and branding repeatedly instead of recording.
- Waiting for a perfect take, perfect lighting, or a perfect thumbnail before uploading anything.
- Skipping the short clip, which is the easiest way to give a new long video a second route to viewers.
Frequently Asked Questions
How long does it take to set up a YouTube channel?
The setup itself is quick, usually an hour or less once you have a Google account, a channel name, and a few images ready. The slower part is deciding what the channel covers. Give the thinking stage a full day so the admin stage stays short and you do not keep second-guessing the name after you publish.
Do I need expensive equipment to start?
No. A phone that records clear video and a quiet room covers the first week completely. What matters more than gear is whether viewers can hear you and see you clearly. Improve the setup after several videos, once you know from experience which part, audio or lighting, is actually limiting you.
How many videos should I publish in my first week?
One published video is a realistic and complete first week. Publishing something and learning the full upload process matters more than hitting a number. After that, aim for a pace you can sustain for months rather than a burst you cannot repeat, since consistency is what gives a new channel a chance to build momentum.
Should I make Shorts or long videos first?
Both, but in a set order. Publish the long-form video first so there is somewhere for viewers to land, then cut a short clip from it or record a related tip and use that to point people toward the full version. The short is the introduction; the long video is what keeps the viewer around.
What if I still cannot decide on a niche?
Pick the topic you can most easily list ten video ideas for, even if it is not your dream subject. A channel that publishes and grows teaches you more than a perfect plan you never act on. You can narrow, widen, or shift the focus later once you see which videos people actually respond to.